Ask the Electrician: 2023 NEC Code Changes

Q: What are some upcoming code changes and how will they impact job requirements in North Carolina?

A little NEC background:

The National Electrical Code - NFPA 70 (NEC) is a set of safety regulations established as part of the National Fire Protection Association (NFPA). Established in 1897 the National Electrical Code is updated every three years. These rules for safety apply to both new construction as well as remodel and repair work for both residential and commercial buildings. It can be an intensive process to see new standards arrive in the NEC. 

  • Government agencies and consumer groups gather data and research emerging safety concerns and hazards, anyone may submit suggestions for alterations to the code.

  • New technology and products are developed and then tested by independent laboratories like UL or ETL.

  • These new technologies and procedures are then presented to the NEC. 

  • Next is a period of testing and gathering feedback from experts, consumers and other entities.

  • Only after this feedback has been reviewed by NFPA/NEC and other regulatory committees is new code written and becomes part of the NEC. 

  • The new NEC is now sent to the individual states for review and adoption.

  • The new codes are not enforced until they have been adopted by the state, and they may be amended.

  • Municipalities may require a “stronger” code at their discretion. The Town of Chapel Hill, for example, has had different ordinances for underground lines due to the heavy tree coverage in our area for years.

It’s 2025, why are we talking about 2023 standards now??

Actual adoption of the NEC code is tricky, North Carolina for example, hasn’t fully updated the residential electrical code since 2014. Since 2017 the legislature has amended out many new residential electrical requirements or did not accept them outright. Now we’re catching up all at once and there are going to potentially be a bunch of changes.

It’s a tough job balancing life safety with economics so it is at the discretion of the state to adopt the NEC code fully or with amendments according to how they feel the changes may impact their state’s specific needs and requirements. Most often this is to allow additional time for tradespeople, lobby groups and regulating agencies to evaluate how specific new codes or standards should be implemented and enforced fairly.  

The 2023 code is scheduled for adoption on July 1, 2025. This will override the amendments to previous years standards and will bring substantial changes across several areas.

Some key areas impacted by this are:

  • Surge Protection all residential new construction & all replacement (new panel, upgrade to service)

  • AFCI - arc fault protection to all habitable rooms/living areas - either device or panel level

  • GFCI - huge expansion here, especially for 240v outlets so almost all major kitchen appliances, car chargers, and by 2027 this will extend to air conditioning

Jobs/Projects that will fall under these coming regulations:

  • Anything that is permitted and requires inspection

  • Panel Replacement

  • Service Upgrades

  • Rewiring your home

  • Service and subpanels to garages and outbuildings

  • New circuits for kitchen and outdoor appliances

It’s for the best reasons:

Nobody likes the idea of added expense or hassle for updates made to our homes but it’s important to realize that changes to the NEC have your safety at the forefront. Over the years the NEC code changes have dramatically reduced both workplace and accidental electrocution deaths across the country. It’s best to make sure any home improvements you do meet the current code and standards. Ignoring or skirting these code requirements may cause issues with home inspections, system compatibility or even worse an accident in your home. 

It’s our job as electricians to stay current on these changes, we are consistently training our team and reviewing new requirements to fully understand what best practices and laws will require. If you’re planning home improvements for this summer, now is a great time to get in touch and discuss how upcoming code changes may impact your project. It all starts with an estimate.

Return to Home Page


Ask the Electrician is a column we publish with our advertising partner WCHL/Chapelboro. In “Ask The Electrician,” Scott answers common questions about electrical work, from switches and outlets to safety issues and preventative maintenance. If you have a suggested question for us to answer – or need an electrician – please reach out to our office.

See the article on Chapelboro.com: 2023 NEC Code Changes

Ask the Electrician: Knob and Tube Wiring

Q: What is Knob & Tube Wiring?

Knob and Tube refers to a type of wiring commonly used from the late 1800’s until the 1940’s. At the time it was cost effective and appropriate for the electrical systems of most homes. It is still found in many older homes today. 

Knob and Tube Components:

  • Wire: K&T uses copper wire but only consists of a hot and a neutral strand. Commonly it is 14 gauge and supported a maximum of 15amps. Homes were often wired with a single circuit for the entire house that did lights and few or no receptacles. As electrical needs grew and plug-in appliances became more commonplace, knob and tube wiring became obsolete by the mid 1940’s.

  • Knob: Circular Porcelain disks with a center nail hole are attached to framing to hold the wire in place or allow it to wrap around and change direction. These “knobs” hold the wire away from any wooden structures and allow it to dissipate heat and insulate it from touching flammable surfaces.

  • Tube: Porcelain tubes are placed where wires need to go through joists or framing structures. These insulate the wire from the flammable wood.

  • Loom: Wires are wrapped in a flexible fabric or rubber casing to insulate and protect them. This was often cotton coated in asphalt or even asbestos. This served to protect the wire especially where it went behind wall spaces or attached to fixtures.

Is K&T dangerous?

Knob and Tube wasn’t inherently dangerous when it was installed but is obsolete and no longer allowed for modern construction. It should be replaced for several reasons:

  • The biggest concern with K&T systems is the lack of a ground wire. This presents a shock hazard and needs to be addressed from a safety standpoint.

  • This lack of ground is especially problematic for bathrooms and kitchen areas that require GFCI/AFCI protection or appliances requiring a three prong plug.  These areas are often modified to try to accommodate modern standards.

  • Modern homes have higher electrical needs so face limitations in amperage for newer appliances and additional outlets and receptacles.

  • Modern layouts use more intricate circuits, often with multiple branches to route electricity to more outlets and appliances. Many knob and tube systems wired the entire home through a single looped circuit.

  • K&T systems can pose fire hazards when trying to insulate around them. Modern blown-in insulation is especially an issue as materials can touch uninsulated wires or allow heat to build up. 

  • The loom materials often become brittle and crack with age, exposing live wires. Additionally, the cloth can be attractive to rodents and other pests and invite chewing. Loom materials are often not rated for exposure to moisture, so damp areas like crawl spaces can be an extra hazard.

  • By nature K&T is more rigid; wires are bent by a “knob” so offer less flexibility than modern Romex.  Modern wiring has better flexibility to be fed through walls and throughout the home safely.

  • Standards for splicing wires together have changed, K&T required hard splicing but allowed for these to be wrapped or hidden, modern code requires a junction box that is accessible & visible. These hidden splices are often wrapped in plastic tape and are a fire hazard.

  • Knob and Tube systems are very likely to have had modifications made over the years to help them adapt to new requirements, these updates often create additional shock hazards or unsuspected dangers.

  • Insurance companies may refuse to insure homes with Knob and Tube Wiring or may have higher premiums for coverage.

What should I do if I have knob and tube wiring in my home?

A first step is to have an electrician check if it is still in use and how widespread it is throughout the home. It is common that knob and tube may be disconnected but left in place or that it may have been partially replaced as renovations and upgrades have been done. It is important to assess both conditions:

  • Disconnected but Left Behind: Most often this is a time saving measure to not remove the old K&T wiring. Unless it is being left in place to avoid extensive damage to the home, it is always best to remove old wiring. It prevents any accidental reconnection to a circuit or eliminates any missed connection that might still allow for a live circuit.

  • Mixed Systems: These are common, especially if part of the home has been renovated or an addition has been added over the years. Larger appliances and HVAC systems may have been upgraded because they require a thicker gauge wire but lighting and regular outlets may remain Knob & Tube.  Almost any modification or mixing or new and old systems can create problems.

Takeaway:

If you have Knob and Tube wiring ideally it should be replaced, this addresses any safety issues and provides a modern upgrade to the entire system. Rewiring the entire house can be an expensive project but actual costs will depend on the layout of the home itself. Costs often depend on how easily wiring can be accessed or how much drywall and interior structures need to be removed versus if new wires can be fished through existing walls.

More commonly, we find homes that have partial knob and tube systems still in place so these may not require a full rewire. If you suspect you have knob and tube wiring in your home, give us a call and we can start with an estimate to assess options and determine next steps.

Return to Home Page


Ask the Electrician is a column we publish with our advertising partner WCHL/Chapelboro. In “Ask The Electrician,” Scott answers common questions about electrical work, from switches and outlets to safety issues and preventative maintenance. If you have a suggested question for us to answer – or need an electrician – please reach out to our office.

See the article on Chapelboro.com: Older Wiring and Modern Updates

Ask the Electrician: Troubleshooting Intermittent Issues

Q: Hit or Miss for the Holidays? Troubleshoot and solve intermittent issues

Few things are more annoying than electrical issues in your home during the holidays.  It always seems to happen at the wrong time. To make matters worse, intermittent problems only happen sometimes and can feel like they are totally random.

Unfortunately, the holiday season can create the perfect storm for issues that can appear intermittent or require troubleshooting. We have friends and family visiting, are cooking and cleaning more than usual, have guests staying in a spare room that is normally vacant and are putting up decorations and stringing lights. All of these activities can contribute to electrical problems that wouldn’t normally surface or are conditional/intermittent in nature.

These are equally frustrating from the electrician’s side, we hear “everything is working fine now” when we arrive or receive the dreaded “it’s not working again” call after our visit. Our goal is always to fix something right the first time but sometimes we can’t replicate the problem during our initial diagnosis or visit.  

Types of issues that may be intermittent include: breakers tripping repeatedly, GFCI faults or AFCI breakers tripping. A non-functional switch or fixture is likely a straightforward fix.

Why does it take multiple visits or additional charges to troubleshoot?

The majority of the time our team can diagnose and fix most problems during a routine service call. If we can’t locate or replicate the issue, it may require a second visit or additional troubleshooting to locate the cause. If the problem is beyond our initial diagnosis or related to another system in the home, we may need to do additional troubleshooting to resolve the bigger problem. Homeowner’s can often help us troubleshoot by gathering information about when or what was happening when the problem occurred. Be sure to consider and let us know about any of the following: 

  • History of the home and systems: Have you recently added or replaced a major appliance or system? Do you have an addition or add-on to your home? Was the work permitted when it was done?

  • Conditions when it happens: Is it impacted by weather? Does it only happen when it’s raining or very cold out? What appliances were running? Does it only happen when you plug in the vacuum cleaner or have a dual oven running?

  • Check for common culprits: Has a cord frayed on a lamp or other plugged in device? Did you overload a power strip with the holiday lights? Is a GFCI switch tripped in another room or location? 

This information can help us pinpoint and fix the issue. We once had a customer who was experiencing multiple AFCI faults and we could not replicate the problem even after 3 visits. We finally figured out that the culprit was a frayed computer cord that the daughter was using when she came home to visit every other weekend. Without the homeowner’s help we would have never known why it was happening. (Fortunately a fresh charging cable for the laptop was an easy fix!)

Don’t let intermittent issues get the best of you. Luckily, most issues are pretty straightforward to diagnose and repair. One way or another we will get the issue resolved, our team loves a good mystery!

Return to Home Page


Ask the Electrician is a column we publish with our advertising partner WCHL/Chapelboro. In “Ask The Electrician,” Scott answers common questions about electrical work, from switches and outlets to safety issues and preventative maintenance. If you have a suggested question for us to answer – or need an electrician – please reach out to our office.

See the article on Chapelboro.com: Troubleshooting Intermittent Issues

Ask the Electrician: Generator Maintenance

Q: What kind of maintenance does my standby generator need?

Whole home generators are a big investment but can offer a lot of peace of mind in the event the power is out. Like any other home system, your generator requires maintenance.  Make sure you are properly maintaining your whole home generator so that it is there when you need it but also to protect the investment you have made.

For most homes, generator maintenance should be done once a year. If you are using the generator frequently or for long periods of time you may want to service it semi-annually based on usage hours.

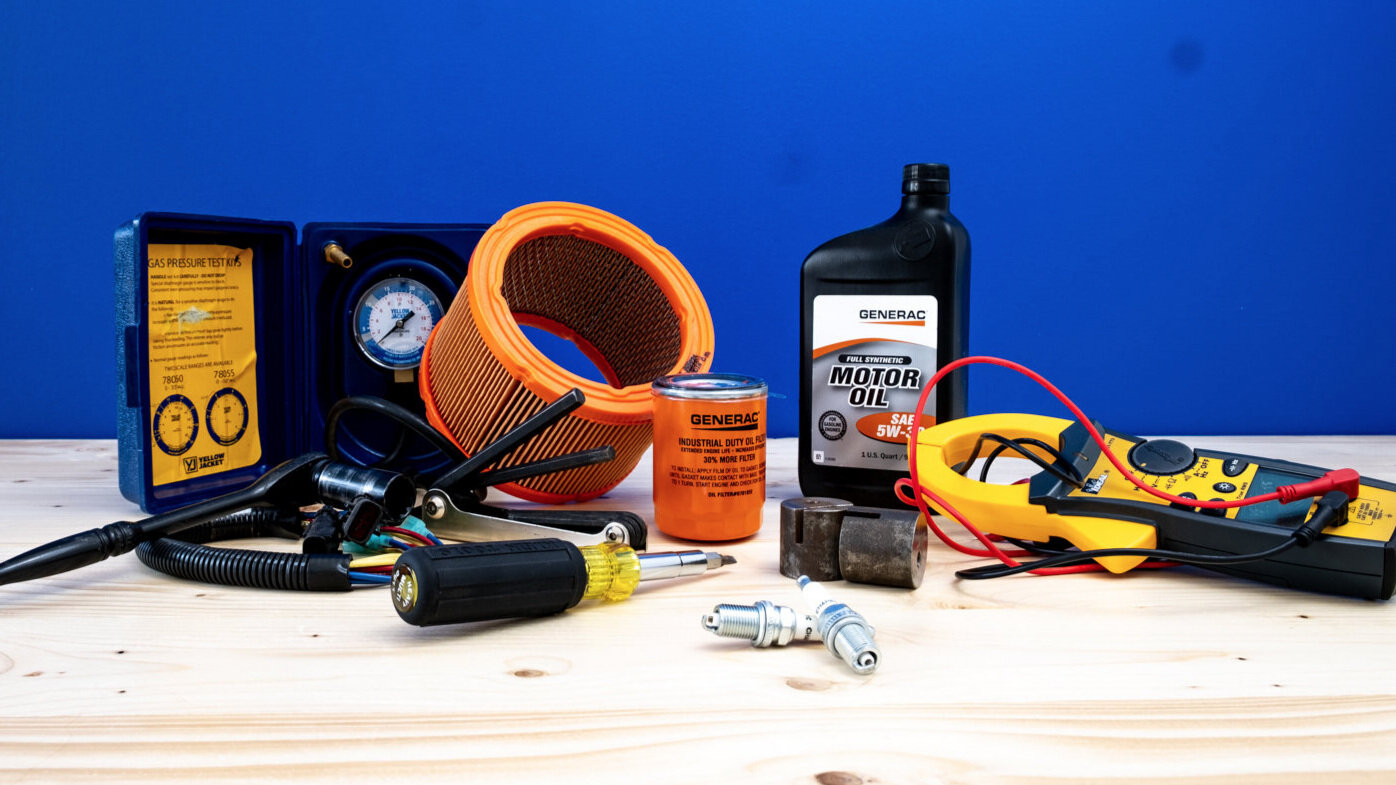
A maintenance visit generally includes:

  • Change oil & oil filter

  • Change air filter

  • Change spark plug

  • Flush and change coolant (if liquid cooled model)

  • Battery test for correct voltage and charge

  • Frequency test

  • Fuel pressure test

  • Load transfer test of system

  • Visual check of exterior for leaks, any rust & correct clearances etc.

  • Visual inspection of fuel lines & connections for wear

  • Visual inspection of AC/DC electrical connections

  • Check for any additional maintenance issues or service recommendations.

We do not recommend homeowners perform the maintenance on their standby generators because of the multiple systems involved. (generator itself, transfer switch to the home electrical panel, propane or natural gas fuel systems etc.) Look for a factory trained technician for your generator brand.  A factory technician will also able to assist with any other repairs or any warranty issues that arise.

Portable Generators:

Portable gas powered generators require maintenance as well, in fact they can require more frequent maintenance than larger whole home systems. Unfortunately we do not do maintenance or repairs on gasoline powered generators but many small engine shops are happy to work on these or often homeowners will perform this maintenance themselves.  

Dynamic Electric offers an easy maintenance program to help customers keep up with their maintenance needs.  You can enroll in our generator maintenance plan free of charge.

Return to Generator Maintenance


Ask the Electrician is a column we publish with our advertising partner WCHL/Chapelboro. In “Ask The Electrician,” Scott answers common questions about electrical work, from switches and outlets to safety issues and preventative maintenance. If you have a suggested question for us to answer – or need an electrician – please reach out to our office.

See the article on Chapelboro.com: Generator Maintenance

Ask the Electrician: Level 2 EV Chargers

Q: Should I install a Level 2 charger for my electric vehicle?

Picking the correct charging level is mostly a matter of convenience and how you are using the vehicle. If you only put a few miles on the car each week, a Level 1 charger may be just fine for your needs. However, if you are using your EV for daily driving and commuting, most people opt to have a Level 2 charger installed at their home. The quicker charging time gives better flexibility.

All electric vehicles come with a Level 1 or “trickle” charger that plugs into a standard three pronged 120V wall outlet. Typically depending on specific model and battery technology charging takes 10-20 hours and is done “overnight” while at home.

Level 2 chargers are a common upgrade for most EV owners. They allow for a much quicker charge in a shorter amount of time.  Level 2 chargers can provide a full charge in 4-6 hours by providing 240V power to the vehicle. They require a larger dedicated circuit, specialty wall plug or hardwire and professional installation by an electrician.

Charging times vary depending on your specific battery size, acceptance rate and charger output but Level 2 chargers are as much as 8x faster than Level 1. EvoCharge’s website has a comparison tool that will detail the different charging times between Level 1 and Level 2 both by time and by miles of charge per hour for specific vehicles.

As electricians we are doing more and more installations of EV Charging systems both for individual homeowners as well as seeing community based installations like adding Level 2 pedestals in apartment complexes and at shopping centers for public use.

Which brand or model of charger should I get?

We are happy to install almost any brand of charger. Some vehicles, notably Tesla, have their own specific chargers while other models can use any “standard” charger equipped with a “J plug” (SAE J1772).  Most car manufacturers will sell a charger specifically branded to your vehicle but there are plenty of aftermarket options as well. Clipper Creek/Enphase is one of the leading names in EV charging equipment and has a wide range of chargers compatible with different models. They have a great tool on their website, simply enter the vehicle make and model and the site will display all the compatible equipment available.

What does it cost?

Basic wall mount installation generally runs from $600-$1,000 for most simple installs plus the charger cost itself. This depends on the availability of existing power to your garage or charging area and the required amperage needed for the charger.  A permit is required. Longer distances, pedestal mounts, digging or trenching and panel upgrades will increase this cost so the best solution is to request a free estimate of your specific needs prior to installation.

EV charger costs can be offset with a federal tax credit of up to 30% by filing Form 8911 with your taxes. Additionally car manufacturers and local utility companies may have programs available to reduce costs even more. Both Duke Energy and Piedmont Electric Co-op offer customers a rebate.

National Drive Electric Week is being held September 22-October 1, 2023. The event is a nationwide effort to celebrate and raise awareness about electric vehicles. Locally, Piedmont Electric Co-op is hosting an event at Carrboro Plaza on the 29th if you want to do some test drives and learn more about EV technology.

Return to EV Chargers


Ask the Electrician is a column we publish with our advertising partner WCHL/Chapelboro. In “Ask The Electrician,” Scott answers common questions about electrical work, from switches and outlets to safety issues and preventative maintenance. If you have a suggested question for us to answer – or need an electrician – please reach out to our office.

See the article on Chapelboro.com: EV Charging at Home

Ask the Electrician: Electrical Panel Maintenance

Q: Does my electrical panel need service or maintenance?

Most homeowners are aware that breakers and/or fuses sometimes wear out and need to be replaced but do not think about the electrical panel itself.  Your electrical panel acts as the transfer point for power coming into your home from the electric company and being distributed to the various circuits and wires in your home. It is also where incoming power is either split or combined to create 120v or 220v for use on these circuits as well as being properly grounded and protected.

The panel components themselves are mostly hardware components, they consist of connections between power coming in and bus bars, neutral or ground terminals and wiring within the “box” to connect and distribute electricity to breakers and then out to the wiring in your home. Wire connections and screws to bus bars and other hardware can simply wear out, corrode, distort or loosen over time and require replacement.

Panel Age:

Like everything else your electrical panel has an expected lifespan.  In general, an electrical panel is good for about 30 years but can last up to 50 years. This means if your home was built before 1990, your panel may be reaching the end of it’s useful life and need replacement.  

Panel Size and Service Upgrades:

One of the most common reasons to consider panel replacement is to allow for additional space/breakers or to accommodate a service upgrade. Because the number of breakers required for a modern home or the amount of incoming power service has changed over the years, a panel upgrade may be required to allow for additional service or space to connect new breakers and circuits.

Federal Pacific or Zinsco Brands:

Both Federal Pacific Electric and Zinsco were major manufacturers of residential electrical panels commonly used from the 1950’s to the 1970’s (as late as the early 1990’s) and is it not uncommon to find them still in use.  Both of these panels had major manufacturing defects and have been involved in class action lawsuits over the years due to the risk of fire and even electrocution. Federal Pacific panels that used “Stab-Lok” breakers were not correctly UL certified and can fail to trip in the event of a surge. Zinsco panels had issues when circuits would melt to the bus bars and prevent breakers from tripping. Unfortunately with both of these panels, they can work just fine until they are exposed to a significant surge so they remain in use in homes even today.

You may be able to identify these panels by the embossed name on the outside cover or labeling inside the door but an electrician can easily confirm if your have either of these.

Code Changes:

As building codes and safety practices change over time, new code may require a panel upgrade or changes to comply with current building codes. This means a panel upgrade may be necessary even if you are doing “other work” such as a renovation. Most commonly this may be to accommodate an outside “shut off” or additional grounding.  

Maintenance or Replacement:

It’s a good idea to occasionally have an electrician check for any loose wires, tighten the lugs, clean any dirt or corrosion off and make sure the panel is weather tight if it is located outside, but panels do not require “maintenance” per se. For the most part, we recommend replacement if your panel has reached that age or you need to upgrade service, increase space etc.

How do I check my panel or know if it needs replacement:

If your home is more than 30 years old it’s a good idea to have it inspected to check condition and wear.  Most commonly, we replace an electrical panel in conjunction with other work being done such as a service upgrade or to increase size/available spaces in the panel.  If we are visiting your home for other work, it’s a good time to ask us to take a quick look at your electrical panel for any potential issues.

Return to Home Page


Ask the Electrician is a column we publish with our advertising partner WCHL/Chapelboro. In “Ask The Electrician,” Scott answers common questions about electrical work, from switches and outlets to safety issues and preventative maintenance. If you have a suggested question for us to answer – or need an electrician – please reach out to our office.

See the article on Chapelboro.com: Panel Maintenance

Ask the Electrician: Circuit Breakers

Q: My breaker tripped what does it mean?

Chances are we’ve all experienced a tripped breaker at some point. You plug in the vacuum cleaner, start the coffee pot and cut on the space heater and “click” no power! Most likely you have tripped a breaker.

Circuit breakers are a safety feature designed to protect against overload and short circuits.  They are basically a switch inside your panel box that senses when too much electrical current is being pulled or used by the circuit, the mechanism inside the breaker sense this and pulls the circuit apart, effectively turning the switch to “off” and stopping the flow of electricity.

Types of Breakers:

The most common breaker for residential use is a single pole 15amp or 20amp breaker. These are commonly lighting and outlets throughout the home. Most homes have multiple circuits like this (often grouped by room or general areas of the house) with each circuit having a breaker.

Items like EV Chargers, kitchen circuits, some large computer equipment etc., can require a higher amperage breaker. These are commonly 30amp -50amp rated and allow for more power to higher use circuits or for dedicated pieces of equipment/appliances.  They look almost identical to a 15a-20a breaker and take only a single “slot” in the panel. 

Large appliances requiring 240v power will have a dedicated two-pole breaker.  This means they have 2 “hot” wires and allow for the increase to 240v power. These breakers are larger, take more space in the panel and often have a larger “bridged” switch. These are most commonly water heaters, dryers and electric ranges.

In addition to these standard types of breakers there are now have options to include additional protection like GFCI or AFCI on a breaker level. There are even specialty breakers to provide combined protection AFCI/GFCI or surge protection for the entire home. For example if your bathroom outlets and lights are on a circuit that is GFCI protected on a breaker level then you do not require individual GFCI protection on the outlets themselves.

Resetting a Breaker:

If you know which things are run on the circuit turn them off. (i.e.: if the breaker tripped when you plugged in the vacuum cleaner, unplug it before resetting the breaker.)

  • Open your electrical panel

  • Take a good look at the breaker and panel itself for any visible issues like charring or melting

  • Look for any breakers in the “off” position (a clearly labeled panel is helpful to know which circuit may be the culprit) – note: a tripped breaker may also appear to be in a mid-position, look for the one that isn’t fully “on” or is out of line with the others.

  • Push the breaker fully to off position

  • Click it back to the on position (it should “click” back into the on position)

  • Close your panel

When to call an electrician:

Resetting a breaker is fairly simple but if you see any of the following, you should call an electrician for help. Generally if the breaker will not reset after 1-2 attempts, it may be time to call for assistance.

  • The breaker feels warm or is hot to touch

  • Any smells of burning or smoke

  • If the breaker or surrounding panel looks melted or charred

  • There are sparks or “sizzling” sounds

  • If the breaker immediately “trips” again

  • Breaker feels “mushy” and does not click into position

  • Breaker is seized and will not move (do not force the breaker or attempt to “hold it on”)

Replacing a Breaker:

Circuit breakers have a fairly long lifespan, up to 30-40 years under normal conditions but it is still good to evaluate them.  Most commonly a breaker needs to be replaced because it has been damaged while preventing a surge or short circuit. Always make sure that new breakers are compatible with your electrical panel and size of the wires in your circuit. Some of the most common breaker brands are Eaton, Square D, Siemens, and GE.

Fuses:

Some older homes have a fuse box instead of a breaker box for their main electrical panel, commonly if your home was built before the 1960’s and you have lower overall power service coming to your home.  Fuses protect against current overload similar to a breaker but cannot be reset, if a fuse blows it will need to be replaced.

What’s Next:

Most often a homeowner can reset the occasional tripped breaker but if a breaker is tripping repeatedly or showing any of the causes for concern, just give us a call. Our service trucks are stocked with the most common household breakers (and fuses) and we can check for any other issues and replace the breaker if needed.

Return to Home Page


Ask the Electrician is a column we publish with our advertising partner WCHL/Chapelboro. In “Ask The Electrician,” Scott answers common questions about electrical work, from switches and outlets to safety issues and preventative maintenance. If you have a suggested question for us to answer – or need an electrician – please reach out to our office.

See the article on Chapelboro.com: Circuit Breakers

Ask the Electrician: Hot Tubs

Q: I want a hot tub, what are the electrical considerations?

There are few things more relaxing than a nice soak in a hot tub after a long day and hot tubs are high on the list of home luxuries added after a home is built.  While it is obvious that installing a hot tub will require both power and water, hot tubs often present a few additional steps that can often take homeowners unaware or result in additional time or cost constraints.

Electrical Needs:

Electrical needs for your new hot tub are fairly straightforward. Most hot tubs require a minimum 50amp dedicated breaker that is of course GFCI protected. Additionally because of the potential water exposure this circuit must use copper wire for better corrosion protection and commercial grade cable with an insulated ground.  Existing panels may need to be upgraded to accommodate this size breaker.

Bonding:

Bonding is an electrical term for connecting all of the systems surrounding the hot tub to each other to distribute any “wild” or leaking electrical current evenly between systems. This is a safety measure to prevent the possibility for accidental shock if a person is in contact with one or more of the un-bonded elements and therefore becomes a potential conductor for this “leaking” current. While this is generally not hard to achieve, it requires a comprehensive look at the entire system to be sure all metal elements are protected such as railings, fences, windows, doors and even gutters. 

If you are considering a pre-owned hot tub, be aware that most hot tubs older than 2010 require an additional bonding ring. Newer tubs generally come as a listed self-contained spa.

Trenching:

Depending on the location of the hot tub, installation may require trenching to install any electrical connections or run water to the location. Homeowners will need to contact 811 to be sure any buried cables can be marked and avoided. The electrical wiring must be a minimum of 18” underground so can interfere with low buried things like cable or phone lines. Additionally, hot tubs require sturdier wire and fittings for underground lines, to incorporate bonding and other requirements.

Permitting:

All hot tub installations are required to have an electrical permit. Additionally because they have some many related systems many local municipalities require a building permit as well to examine location suitability on decks or yard/patio installations. These permits add several additional steps to allow for inspections and can impact the timing and coordination of the various steps.

Safety Concerns and Access Requirements:

Similar to the requirements that a swimming pool must be fenced, hot tubs are required to either be fenced in or to have a lockable cover. This prevents unsupervised access to the hot tub and reduces accidental drowning risks.

Make a Plan Early:

While adding a hot tub may have a few more factors to it beyond just power and a water supply but don’t let that overwhelm you. These additional considerations can feel strict but they are all safety related. It’s worth getting an estimate early in the game to determine which of these factors may apply to your hot tub plans. Thankfully none of this will affect any clothing optional adult beverage consumption or other plans you might have for your new hot tub!

Return to Home Page


Ask the Electrician is a column we publish with our advertising partner WCHL/Chapelboro. In “Ask The Electrician,” Scott answers common questions about electrical work, from switches and outlets to safety issues and preventative maintenance. If you have a suggested question for us to answer – or need an electrician – please reach out to our office.

See the article on Chapelboro.com: Hot Tubs

Ask the Electrician: Dimmers; Updates and DIY

Q: My new light fixture is too bright, do I need a dimmer switch?

It is becoming more common with newer light fixtures to have LED integrated bulbs rather than replaceable bulbs. We get a lot of calls after new light fixtures have been installed that they are simply “too bright” or not what people expected.  This can be addressed in a couple of ways.

Installing a dimmer switch may be the best solution to this issue. Always check when purchasing new fixtures if the LED is compatible with dimmers. This is commonly a price point issue and should be clearly stated on any packaging.  A dimmer switch allows for great control and flexible options for setting the lighting to best suit your needs.

Dimmer switches also offer a lot of flexibility or expanded use of existing features. New dimmer switches can be compatible with new fixtures and also by putting new dimmer compatible bulbs in existing fixtures. These can be for a wide variety of both interior and exterior light fixtures so are a great option for an easy, cost effective upgrade or new purpose of existing lights. Modern dimmer switches can be smart home compatible as well.

Along with considering a dimmer, many newer light fixtures have a setting for the color or “warmth” output of the fixture. This is often a small switch on the interior of the fixture and can regulate the color range of the fixture itself. You may be able to adjust this yourself and information is commonly included in the instructions, try different settings until you find the one that works best for the location and usage of the fixture.  This is measured in Kelvin and lower ranges (2700K) give a warmer cozier light while higher ones (5000K) emit cooler colors that feel brighter.

Updating Existing Dimmer Switches:

If you have recently upgraded an existing light fixture to LED bulbs you may have issues with an existing dimmer switch. Newer LED bulbs often require replacing or updating the dimmer switch to one that is compatible with LED technology. This is an easy and affordable fix in most cases.

If your old dimmer switch isn’t compatible with new LED bulbs you may get symptoms like:

  • Dimmer switch does not work at all

  • Humming or buzzing noise

  • Flickering or “pulsing” of the new bulbs

  • Dimmer action is not smooth, lights jump brighter or dimmer unexpectedly 

If the bulbs do not fully turn off or glow slightly even when turned off this may be a bulb or fixture issue.  Try replacing the bulb with a higher quality LED. Phillips is a great brand for both quality and compatibility with existing fixtures and dimmers.

DIY or Call an Electrician:

Anything DIY requires some experience to ensure that the job can be completed safely and correctly but many homeowners can perform a simple swap out of a dimmer switch on their own if they choose to.  By far, Lutron or Levitron brands are great quality and widely available brands at many big box retailers or online.

If that new fixture is a little to bright or not doing what you want a dimmer switch or adjustment to the color range may be the easy solution. 

Return to Home Page


Ask the Electrician is a column we publish with our advertising partner WCHL/Chapelboro. In “Ask The Electrician,” Scott answers common questions about electrical work, from switches and outlets to safety issues and preventative maintenance. If you have a suggested question for us to answer – or need an electrician – please reach out to our office.

See the article on Chapelboro.com: Dimmers, Updates and DIY

Ask the Electrician: Apprentices

Q: Apprentice Training: Why is there an extra person here at my job?

Apprentice training is a big deal here at Dynamic Electric and most of our service trucks are running a two-person team of an electrician and a qualified apprentice to make sure we can best serve our customers. We do get questions about why there are two people here to do the work.

While the basics can seem simple, electrical work has many different facets, especially for residential service work. Something as “simple” as changing an outlet may require broader experience as factors like age of the home, existing conditions and code requirements can all make a “simple task” much more complicated. Service electricians need to have knowledge and experience across a broad range of areas and systems. There is no substitute for hands on experience when it comes to these things.

Becoming an electrician is a long process.  Consideration for a journeyman electrician (now journeyperson according to the NCAIEC)  to even sit for the licensing test with the NCBEEC requires a minimum of 4000 hours of documented work under a qualified electrician. This is down from a previous requirement of 8000 hours so many journeymen electricians have years of experience before being prepared to take the licensing courses with the state.  Trade schools can provide a great start but there is no substitute for hands on experience. In fact, the NCBEEC only recognizes a maximum of 600 hours for any school courses, the rest actually must occur as hands on training.

What will the apprentice do while here?

This depends on the experience of the apprentice as well as the type of job we are doing but here are some common apprentice duties:

Apprentices serve as helpers, bringing tools and materials and helping to hold, adjust or move things for the electrician, this helps with both time and safety on the job. (ie: reducing the number of times an electrician climbs up and down a ladder)

  • These are experienced workers; they may perform all sorts of tasks related to your job within their scope of experience and under the watchful eye of the electrician.

  • Apprentices may just observe and learn new things while on your job, if they are not familiar with the job specifics.

  • They may document our work, ask questions and assist with preparing quotes for the electrician.

  • Apprentices are always an important “second set of eyes” to check and double check our work.

One thing the apprentice won’t do is cost you extra money.  They actually help us be more efficient. All of our pricing is “task” based, if you see the electrician take an extra few minutes explaining something, don’t worry this time is “on us” to help train the next generation, customers are never charged for this extra time.

Where or how do you get apprentices?

Our apprentices come from a wide variety of backgrounds and experience levels.  While apprenticeship is a learning path our apprentices are fully paid employees, we are OCLW certified and they enjoy the same benefits as our other employees. We’ve all heard about how trade skills are dying out and Dynamic Electric is committed to training and developing new electricians. Many of our current electricians have come up through the ranks of apprenticeship with our company to become journeyperson electricians with us now.

Chances are good that you will see an apprentice who is working alongside our electrician if we come to your home. They are a huge part of our ethos as a company to train and help future electricians. Say hello and feel free to ask them any questions, they are a wealth of knowledge and experience and a core part of our customer service approach. Apprentices make our entire team stronger. If you know of someone seeking a new career, send them our way at www.dynamic-electric.com/apprentices.

Return to Home Page


Ask the Electrician is a column we publish with our advertising partner WCHL/Chapelboro. In “Ask The Electrician,” Scott answers common questions about electrical work, from switches and outlets to safety issues and preventative maintenance. If you have a suggested question for us to answer – or need an electrician – please reach out to our office.

See the article on Chapelboro.com: Apprentices

Do you offer financing?

At this time Dynamic Electric does not offer financing. We have partnered with several providers like GreenSky over the years but found that the finance programs were not being utilized or did not offer rates and payments plans that worked for our customers.

In general, many customers can find competitive rates and financing options through other sources. Many credit unions and banks offer both secured and unsecured loans for home improvements.

Back to FAQ

What's included in the Annual Generator Maintenance?

At a minimum your generator should be serviced every year. This ensures that your generator is ready to perform in the event of a power loss.

Annual Maintenance Includes:

  • Change Oil & Filter

  • Change Air Filter

  • Change Spark Plug

  • Change Coolant (if applicable)

  • Battery Test for correct voltage and charge

  • Frequency Test

  • Fuel Pressure Test

  • Load Transfer Test of System

  • Visual Check of exterior for leaks, rust, location suitability & clearances etc.

  • Visual Inspection of fuel lines & connections for wear

  • Visual Inspection of AC/DC electrical connections

  • Check for any additional maintenance issues or service recommendations.

Download Maintenance Brochure

Generator Maintenance Program Enrollment & Details

Back to Generator Page

DSCF6144.jpg

Ask the Electrician: Sizing Up Generators

Q: What size generator do I need for whole home protection?

Hurricane season is over but the possibility of winter weather is looming ahead. Whole home generators are a big investment but can offer a lot of peace of mind in the event the power is out. We are becoming increasingly dependent on having reliable electricity as modern homes generally have more appliances/electronics and we work or school from home more. Many homeowners consider a whole home generator at some point so let’s talk a little about the different types and factors that impact the overall cost. Generac is by far the leading brand of whole home generators so we will look mainly at their offerings and models.

The first step is of course a load calculation to look at the kW or size of generator required for your home, this will factor in appliances, current power service and any exceptions for gas powered appliances, as well as other needs. In the most basic terms, we find homes under 2000 sq. ft. are considering a 14-18 kW generator and homes over 2000 sq. ft. are more likely somewhere between 22-26 kW as a baseline. It often makes sense to “size up” when in doubt because a larger generator may run more efficiently than one that is “barely enough”. The cost difference is often negligible given other fixed costs and also allows for any future increases in demand.

Additional Cost Factors:

A whole home generator isn’t a small investment. In addition to the cost of the generator there are a number of other costs that impact the overall project. These cost considerations are often overlooked as the focus tends to be about discussing only the kW or “size” of the generator but they often impact buying decisions as they are mostly a fixed cost regardless of “what size” generator you decide on.

Be sure to consider the cost of items like:

  • Installation or upgrades to Liquid Propane or Natural Gas tanks and lines to connect the generator

  • Location of the generator and accessibility to both fuel source and the electrical panel

  • Cost associated with the transfer switch

  • Permit fees & inspections

  • Any panel or service upgrades needed in order to connect the generator

  • Future repairs and maintenance costs over the life of the generator

Air-Cooled Guardian Series:

This is by far the most common residential whole home generator made by Generac and our go to solution for most of our customers. Currently these units range in size from 14 kW – 26 kW and are specifically designed for residential usage. They are incredibly reliable and covered by a 5 year warranty.

Liquid Cooled Protector Series:

These units are most often seen for commercial/small business uses or large homes that may have multiple buildings that need back up power. They are significantly more expensive for both initial costs as well as maintenance. They range in size from 22 kW all the way to 150 kW.

Smaller Air Cooled Models:

There is an air-cooled 7 kW PowerPact available as well as a 10 kW Guardian but consumer demand is shifting to larger “whole house” systems. Given the overall costs of a whole home generator most people are opting for systems that can provide power for the entire home rather than the partial protection offered by these smaller units.

Eco-Gen Models:

There is also some new technology out for eco-friendly home generators designed to work with solar, wind or off-grid homes. As power supply technologies change these options will likely expand but currently this is only available as a 15 kW model.

Portable Generators:

Never forget, there are also plenty of options for gasoline powered portable generators and many homeowners will opt for this budget friendly solution by adding a transfer switch. This is a good option for households that just need to power a few essentials for shorter outages and many homeowners may already have one for other recreational uses.

The first step towards any generator project is an on-site evaluation and discussion about the goals, needs or expenses specific to your home.

Return to Generators


Ask the Electrician is a column we publish with our advertising partner WCHL/Chapelboro. In “Ask The Electrician,” Scott answers common questions about electrical work, from switches and outlets to safety issues and preventative maintenance. If you have a suggested question for us to answer – or need an electrician – please reach out to our office.

See the article on Chapelboro.com: Sizing Up Generators

Ask the Electrician: Lighting Watts and Lumens

Q: What is the difference between watts and lumens?

Daylight Savings has arrived and the days are shorter and darker. This time of year we are all spending more time inside and looking to our lighting to keep things bright and chase away the darkness.

As lighting technology has become more efficient there has been a shift in terminology that can leave many consumers at a loss when selecting new bulbs and fixtures. In the days of the incandescent bulb it was common to select and discuss lights by the watts (actually Watt Hours) but new LED bulbs are more likely to refer to a lumen rating for output. 

Watts: Measures of Usage

Skipping a full physics explanation, many of the modern terms used to describe power usage originated during the industrial revolution as the world started to define relationships between power and time/output. The term watt was named after Scottish inventor James Watt. (He also coined the term horsepower in an effort to describe the power created by his improved steam engines to the public.)

In simple terms a watt is simply a measure of power produced. For electric light bulbs the term watts is commonly used to describe watt-hours (Wh) or the amount of energy used to power the bulb for an hour.

Cost was important:

As indoor electricity became commonplace, the cost of electricity was significantly higher than today so it made sense to discuss lights in terms of the energy or costs incurred.

For the consumer in 1880, the cost to run a 100Wh bulb for an hour was the equivalent of 3 hours of work, whereas today it is only seconds of labor for the same hour. (Reference: Statista.com)

Lumens: Measures of Output

As modern lighting has become more efficient the terminology is changing to focus more on measures of output than power usage. Here enters the lumen. Instead of a measure of cost a lumen is a measure of output of visible light.  

LED lighting today us roughly 7 times more efficient than incandescent bulbs so manufacturer’s are shifting their focus and labeling bulbs to reflect the amount of light produced rather than energy consumed. In addition modern LED bulbs last longer than traditional incandescent bulbs.

LED bulbs are simply more efficient at producing light/lumens with the same watt usage than incandescent, halogen or CFL bulbs. An incandescent bulb produces about 12-18 lumens per watt while modern LED can range anywhere from 75-100 lumens per watt depending on manufacturer and quality of the technology. 

Determining Lumen Requirements:

A simple chart or online calculator may be the easiest way to determine lumen requirements if you are replacing a single bulb that you are satisfied with. For more detailed lighting projects or upgrades to overall design you may want to look at the purpose of the room and/or fixture.  

Factors like square footage, room or fixture purpose as well as color range of the light emitted can have a big impact on selecting a light fixture.

What’s Next:

Once you understand the basics of lumen output and have determined your needs it’s important to look at the color range and type of lighting you would like to have.  We will talk about that next - stay tuned!

Return to Home Page


Ask the Electrician is a column we publish with our advertising partner WCHL/Chapelboro. In “Ask The Electrician,” Scott answers common questions about electrical work, from switches and outlets to safety issues and preventative maintenance. If you have a suggested question for us to answer – or need an electrician – please reach out to our office.

See the article on Chapelboro.com: Lighting Watts and Lumens

Ask the Electrician: Lighting Temperatures and Types

Q: What color temperature and what type of light should I get?

Lights and basic lighting design become even more crucial during the longer nights of winter. We have talked about lumens as the amount of light provided by different bulbs and fixtures but this is not the only factor in selecting lighting.

Color Temperature:

Most light fixtures and bulbs will include information about the color of the light emitted based on the Kelvin scale. Kelvin is a measurement of thermodynamic temperature. Visually, lower Kelvin ratings appear warmer and have a red/yellow tint while higher ratings appear cooler and have more blue. Lights with the same lumen output appear completely differently to our eye based on the Kelvin or color temperature. Most residential indoor lighting commonly ranges from 2500K-6500K.

The temperature of the light helps to define what the space is used for. In general lower/warmer temperatures as used in living spaces and bedrooms. Kitchens & bathrooms are often mid-range or daylight temperatures, while offices and workspaces like countertops benefit from cooler color ranges.

New LED light fixtures often have adjustable color range settings so homeowners can select the temperature that they prefer based on the space or use desired. Individual bulbs are often labeled as warm white, daylight or cool white and should provide a Kelvin rating as well. Combining the color temperature with the type or goal of the lighting fixture is key to making the most of spaces and rooms in your home.

Types of Lighting:

Lighting and interior design typically look at three main types of lighting for any given room or space; general lighting, accent lights and task lighting. The best lit rooms often combine two if not all three of these elements to create a rich and welcoming environment as well as the functionality of defined the purpose of a given room or space.

  • General or Ambient Lighting is used to simply provide basic illumination to the space. It is often a lower level or baseline of needed light for the room and often the first to be turned on upon entering a room. Commonly these are ceiling fixtures, floor lamps or can lights.  As a rule, ambient lighting is often warmer/lower Kelvin range.

  • Accent Lights do exactly that - they provide additional light and direct attention to a specific area or feature.  It could be artwork, a fireplace or to draw attention to the kitchen island.  Often these are wall sconces, pendants or up-lights that are closer to a neutral mid range or daylight Kelvin temperature.

  • Task Lighting is often the brightest and provides extra light for workspaces and areas like offices, kitchens and bathroom vanities. These are often under cabinet lights, desk lamps, spotlights and other directed lights.  Task lighting is often a cooler, higher Kelvin rating.

Which is Best?

Lighting decisions are a huge matter of personal preference. Don’t be afraid to experiment! Even swapping out a few light bulbs for a warmer or cooler color or more/less lumens can have a huge impact on your home. Feel like that one corner is always a little dark? Redoing your office and need a better option for your workstation?  Consider adding an additional or different type light fixture. A different light, new bulbs or more defined type light fixture can really change a space.

Buying & Installing Fixtures:

A majority of our customer chose to purchase their own fixtures. There are a ton of options and selections to chose from across a wide range of price points.  Dynamic Electric can help you install any new fixtures or simply update older ones.

Return to Home Page


Ask the Electrician is a column we publish with our advertising partner WCHL/Chapelboro. In “Ask The Electrician,” Scott answers common questions about electrical work, from switches and outlets to safety issues and preventative maintenance. If you have a suggested question for us to answer – or need an electrician – please reach out to our office.

See the article on Chapelboro.com: Lighting Temperatures and Types

How much does installation of a Level 2 EV charger cost?

Wall mount installation generally runs from $600-$750 for most simple installs plus the charger cost itself. This depends on the availability of existing power to your garage or charging area and the required amperage needed for the charger. Longer distances, pedestal mounts, digging or trenching and panel upgrades may impact this cost so the best solution is to request a free estimate of your specific needs prior to installation.

Back to EV Charger Page

Ask the Electrician: Can I DIY?

Q: What kinds of projects do you recommend for DIY?

Plenty of homeowners are taking on DIY projects for themselves to both save money and just for the enjoyment of completing tasks on their own.  For safety reasons it can be hard to determine what electrical projects are best to complete yourself and which ones require an electrician.  If you have any doubts it is best to contact a licensed electrician, better safe than sorry!

Be sure to give some thought to your experience level and knowledge before taking on any electrical DIY projects. Some homeowners are comfortable doing some basic small projects such as swapping out a light fixture, replacing an outlet or installing low voltage lighting and other will opt to call a professional every time.  Many of these small projects have great tutorials and other online resources that can be reviewed beforehand.

Safety First:

Anytime you are working with electricity, the safest thing to do is to turn the power off both at the wall switch as well as turning off the breaker inside your electrical panel. Always double check that the circuit is off before doing any work, never assume it is off. Check and double check to avoid the risk of shocking yourself or shorting out other wiring or appliances.

Invest in a few good tools for the project:

Some basic electrical tools are nice to have on hand even for smaller projects. We recommend starting with the following:

  • Circuit Tester

  • Lineman Pliers

  • Wire Strippers

  • Good Quality Wire Nuts

Look & Label:

If you are replacing a fixture or outlet be sure to look carefully at how the original is put together before removing any wires or taking things apart. Making labels or taking photos can save a lot of headaches when it is time to put things back together.

Some things are best left to an electrician:

Obviously there are plenty of projects that even a knowledgeable homeowner should call an electrician for. If you do not feel absolutely comfortable with your task it’s better to call a professional. We strongly advise against any DIY projects that involve the following:

  • Anything with the Main Electrical Panel

  • Any outlet or appliance that is sparking

  • Anything affecting the main service feed to your home

  • Wires or cables that are spliced, damaged or look burned

  • Any projects that require bonding or grounding to other systems                                                                                    

Not feeling comfortable:

It’s fine to change your mind and decide to ask for help. For obvious liability reasons we can’t “talk you through” a project or answer questions over the phone but are happy to schedule a service call or estimate and take over a project if you decide that DIY isn’t for you!

Return to Home Page


Ask the Electrician is a column we publish with our advertising partner WCHL/Chapelboro. In “Ask The Electrician,” Scott answers common questions about electrical work, from switches and outlets to safety issues and preventative maintenance. If you have a suggested question for us to answer – or need an electrician – please reach out to our office.

See the article on Chapelboro.com: Can I DIY?